Organization QuickStart Guide
If you’re an Organization Admin (e.g., an administrator for a school district or school), this handy QuickStart guide provides the essential instructions you need to get your organization set up in the CareerSafe Campus as quickly and easily as possible.
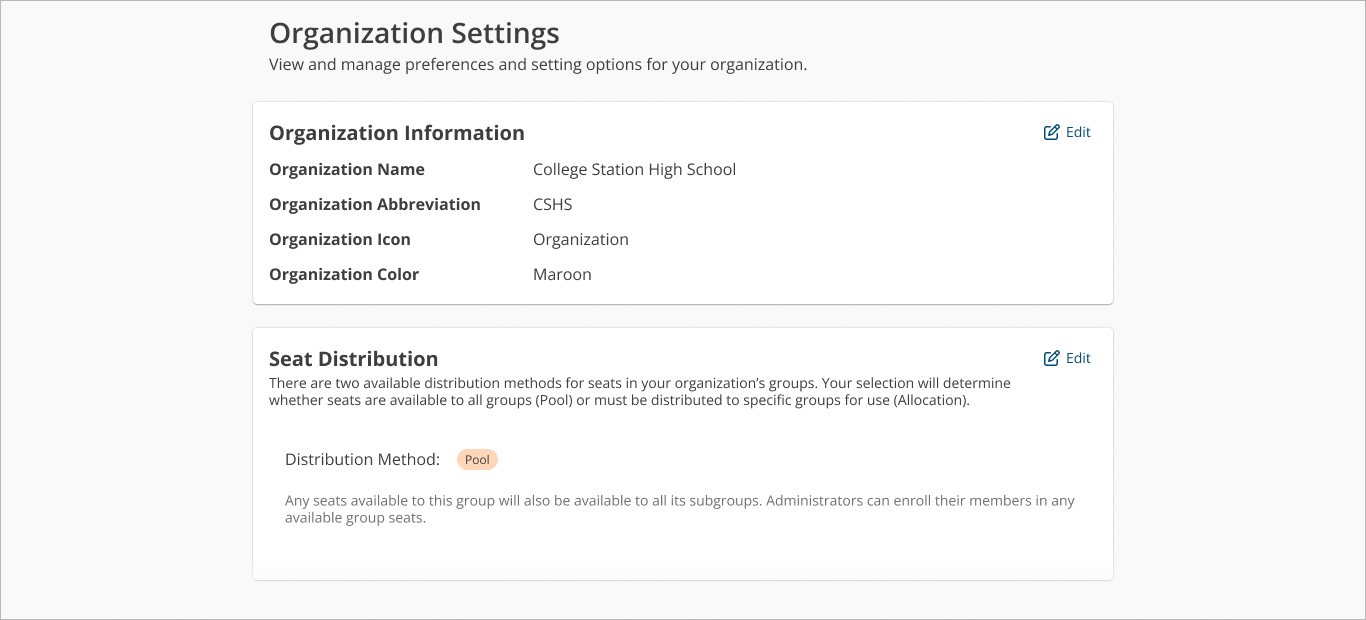
Organization Settings
The first thing you should do is verify the information on your Organization Settings page. To access this page:
- Sign in to your CareerSafe Campus account.
- In the navigation bar on your Home page, click Manage then Groups.
- Click Settings in the Organization Detail Card.
From here, you can view and edit important settings for your organization, including:
- Seat distribution method — There are two available distribution methods for seats in your organization’s groups. Your selection will determine whether seats are available to all groups (Pool) or must be distributed to specific groups for use (Allocation).
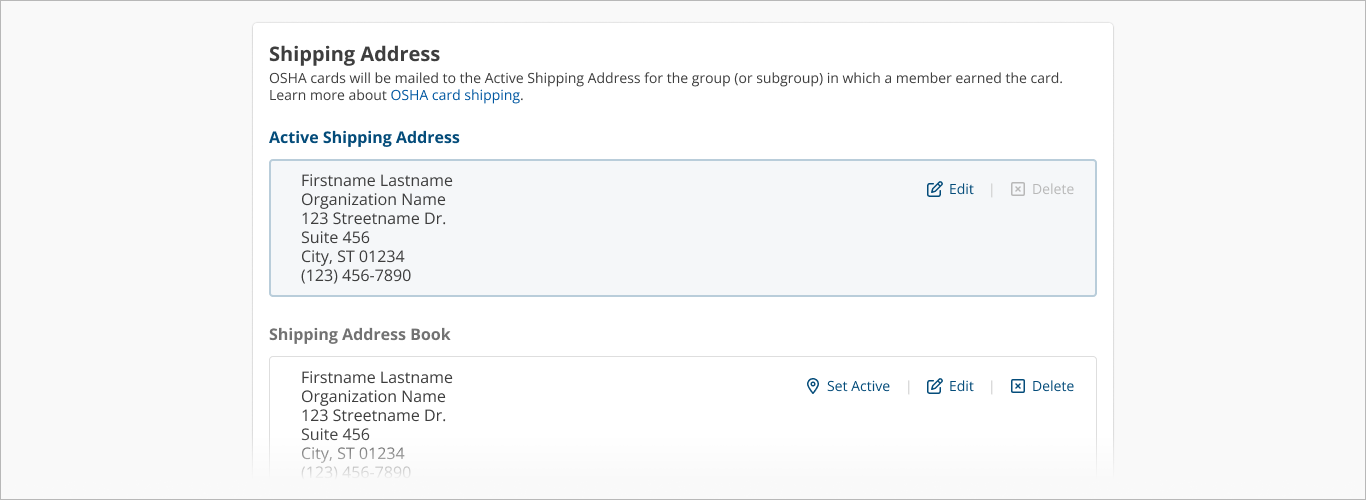
- Shipping Address — OSHA cards will be mailed to the Active Shipping Address for the group (or subgroup) in which a member earned the card.
Making sure these are all correct will set the foundation for your organization to run smoothly.
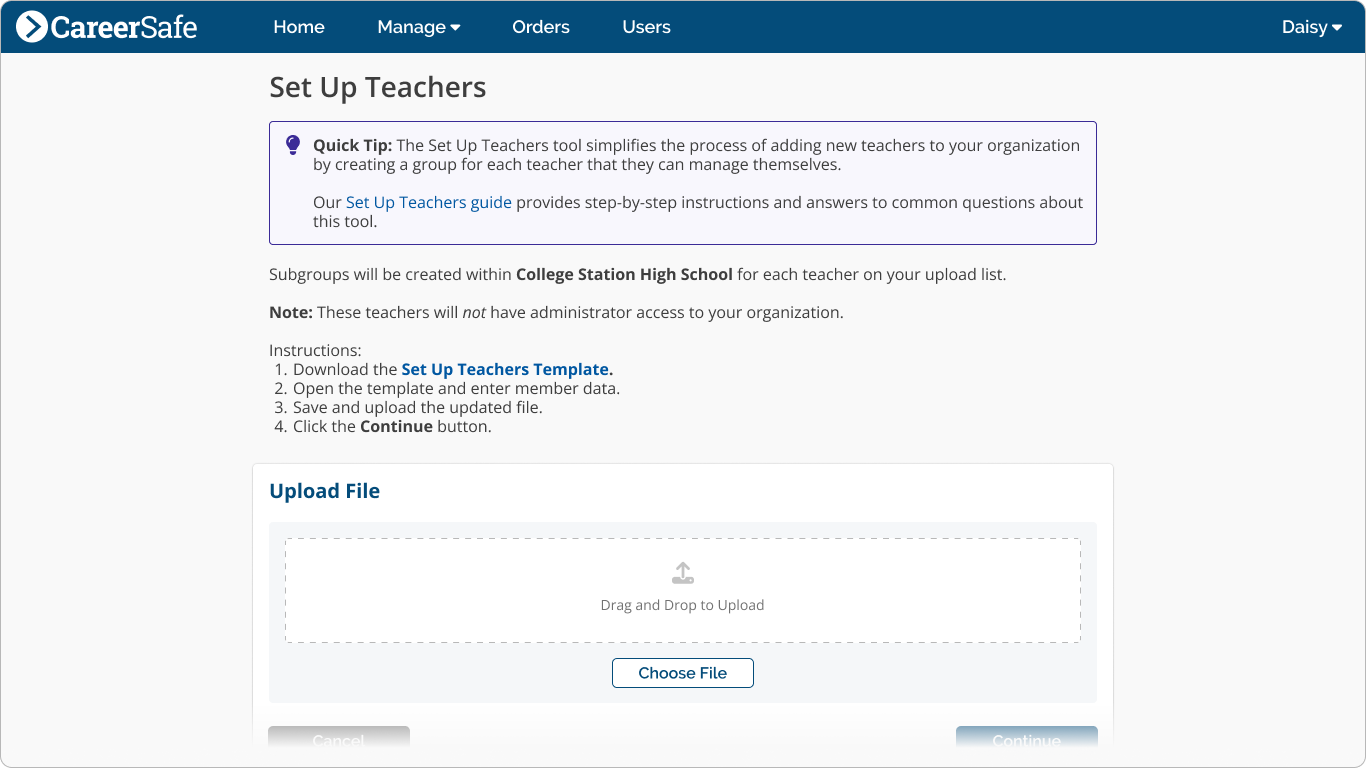
Setting Up Teachers
The Set Up Teachers tool allows you to add teachers to your organization and create subgroups for each of them in one streamlined process. To access this tool:
- Find the Organization Detail Card on your CareerSafe Campus Home page or on the Manage Group page (Manage > Groups from the navigation bar) for the organization your teachers are a part of.
- Click Set Up Teachers.
- Follow the instructions on the Set Up Teachers page.
Each teacher from your upload list will be given an Admin role in their new group and will receive an email notification with further instructions for group management, including how to add and enroll students.
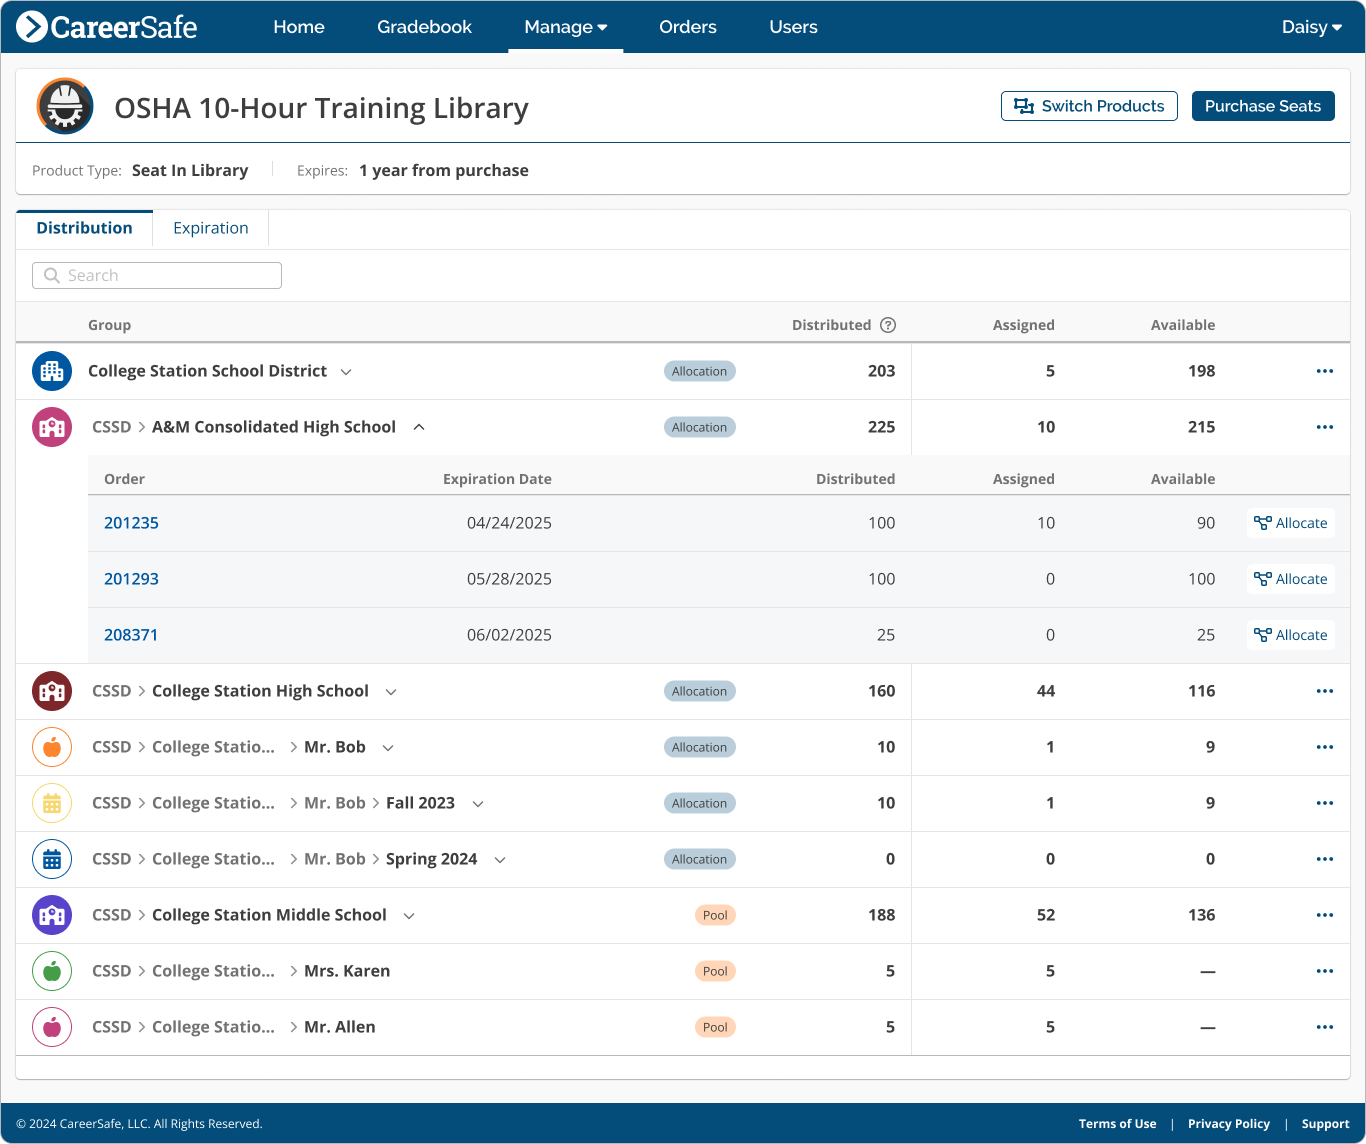
Allocate Seats
Once you’ve added your teachers, you can view and distribute available product seats to your organization’s subgroups from the Manage Seats page (Manage > Seats from the navigation bar).
If the correct product is not showing, you can click Switch Products, then select the product you want to allocate. Once you’ve selected a product:
- Click the Expand () icon next to the organization or group you want to allocate seats from.
- Click Allocate next to the order you want to allocate seats from.
- The subgroups you can allocate to will display. Enter the number of seats you want to allocate to each.
- Click Save.
Assigning Roles
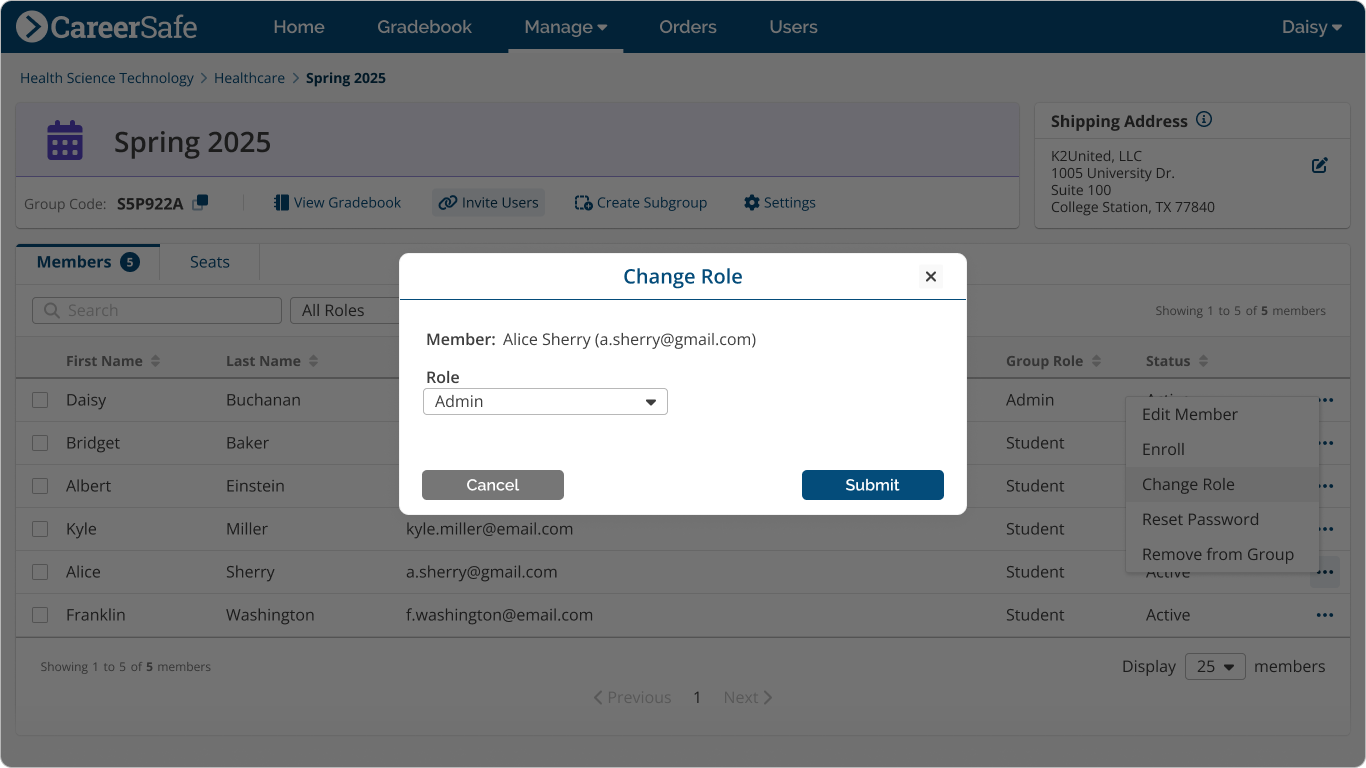
If you need to change a member’s role in your organization or one of its subgroups, you can do so from the Members Tab of the Manage Group page for the appropriate group. To change roles:
- Click the More Actions icon () at the right end of the member’s row in the Member table.
- Click Change Role on the popover menu.
- Select the role you want the member to have from the drop-down menu.
- Click Submit.
We’ve also created a Teacher QuickStart Guide that has instructions for creating groups, adding members, and enrolling students.
View our Support section for more guidance and help with additional questions.